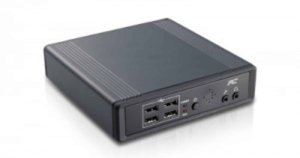
The Viglen MPC-L (<-- PDF link) is a low powered (both in terms of CPU speed and power consumption) compact computer.
They are extremely similar to the Linutop machine (i.e. identical) and are actually an FIC ION 503 under the hood.
It comes preinstalled with xubuntu, a version of ubuntu that substitutes the gnome window manager with XFCE.
Better still, email Duncan Hargreaves at Viglen (tell them the ubuntu podcast sent you) and you can pick one up for a mere £79.
If like us, you are a stickler for utilising similar OS environments for support reasons (including the window manager) then a full install of ubuntu is the way to go.
Other than gnome, a newer version of ubuntu is necessary for long term support - the version of xubuntu preinstalled on the MPC-L is 7.04 which is now end of life. This means no more automatic updates (in fact, these result in a 404 error...)
Beyond the software, the hardware has a couple of foibles, which we will need to work around for ubuntu to boot properly. ACPI support is non existent, and the BIOS does not appear to be PNP compliant.
The installation process for Ubuntu 8.04 is thankfully simple. (You will need a USB CD drive to carry this out)
- Attach the CD drive via the rear USB ports on the MPC-L. The machine will not boot from a device attached to the front ports.
- Check the BIOS boot order - ensure USB CD-ROM drive is higher on the list than IDE HDD.
- Restart the machine with the ubuntu installation CD in the CD drive
- When you hit the main installation menu, press F4 and ensure ACPI=OFF is selected (with a small x)
- Install as normal beyond this point - selecting keyboard language and location etc.
BE WARNED: The installation will take a very long time - approx 2-3 hours
- Upon restart, you need to edit the GRUB boot string, so ACPI is off. Edit the first ubuntu 8.04 entry on the grub list. One of the entries looks contains the line "UUID=xxxxxxx" where the 'x' are hexadecimal characters. Append this line, adding:
pnpbios=off pci=noacpi
Then press enter to save the entry.
- Press 'b' to boot from the edited entry.
- Upon logging into gnome for the first time, you will need to update (if only for the updated graphics driver which will allow resolutions over 800x600 - the key package is available here (xserver-xorg-video-amd))
- You will need to permanently edit your GRUB list, to avoid having to edit the line (as per step 6) on every boot. The file is located at /boot/grub/menu.lst. Edit this with gedit or similar (from terminal: sudo gedit /boot/grub/menu.lst) and then run: sudo update-grub from the terminal.
- That's it! A fully working installation of ubuntu hardy!
